This is a short tutorial on how to create custom icons for Burg, since I have been trying out some new operating systems and noticed there are no icons for them. The tutorial will cover how to make the images in Gimp (although you could use Photoshop as well) as well as how to edit existing themes to add your custom icons into them.
If you would like to see how to install Burg, see my previous tutorial: [Ubuntu 10.10 / 10.04 – Grub 2 with Themes](https://www.jasonernst.com/posts/2010/05/05/Ubuntu-10-04-Grub-2-with-Themes)
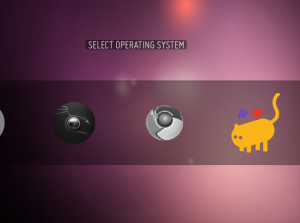
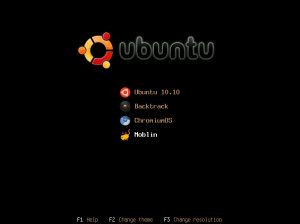
I will also make the icons I have created available for anyone who would like to use them. For this tutorial I will use Backtrack Linux, Mobiln and Chromium icons since there is nothing available for them on Burg yet (AFAIK).
**Step 1: Edit the burg.cfg file to adjust the “classes”**
Notice in the example below I have added the “–class moblin” argument to the entry for Moblin. We will use this later when adding the icons to our templates. You can do something similar for Chromium and Backtrack to make sure the appropriate icons appear for those entries as well.
```
menuentry "Moblin" --class moblin --class linux --class os --group group_/dev/sda7 {
insmod ext2
set root='(hd0,7)'
search --no-floppy --fs-uuid --set dc4dfece-206f-4d38-b35c-6aac2fb55522
linux /boot/vmlinuz-2.6.31.5-10.1.moblin2-netbook root=/dev/sda7
}
```
**Step 2: Tell Burg the file names of your icons**
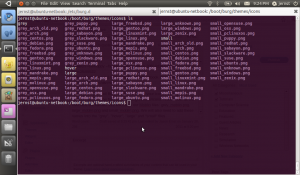
Here we will edit the files in /boot/burg/themes/icons. Notice how all the files here are named. We will make our Moblin files: grey_moblin.png, large_moblin.png and small_moblin.png. We will also need to add these names into the “grey”, “hover”, “large” and “small” files.

So, we will just follow the pattern and add entries for moblin. For example, in the grey file, we add the following:
```
-moblin { image = "$$/grey_moblin.png" }
```
Continue doing this for all the icons you want to make, in all of the types of icon files (large, grey, hover etc).
**Step 3: Creating the image**
This part is a bit tricky, since burg is a bit picky when it comes to image format. The large images should be 128 x 128 pixels. The small should be 24 x 24 pixels. When you export the png file, make sure you flatten the image if you used layers and then uncheck all of the boxes. You can leave on compression if you like to reduce the file size. The most important thing to note, is greyscale is not supported, so make sure you save back into rgb for your grey files. Also, if you want to emulate how the gray images are smaller, reduce the size to 90×90 and then grow the canvas back to 128×128. (for more details see: [http://code.google.com/p/burg/wiki/ThemeCustomization](http://code.google.com/p/burg/wiki/ThemeCustomization))
**Step 4: Testing**
If you like you can reboot each time to test out your changes, but the easiest way is with burg-emu. If you run this as root (or with sudo) and give it the “-D” option, you can change themes and view what each looks like with your icons.
**The icons…**
Here are the icons I made myself. Note: I don’t claim to have any skill in this area, so don’t blame me if they are ugly. I posted this tutorial so that hopefully some people with more skill can create some better ones! If you do, please send me an email and I’ll post them up here, or at least post a link.


**Download**
Here you can get the icons, there is one set for Chromium, one for Moblin and one for Backtract: [icons.tar](https://web.archive.org/web/20131202215723/http://www.jasonernst.com/wp-content/uploads/2011/01/icons.tar)